Showing posts with label strip piecing. Show all posts

Monday, May 6, 2013

scrap pile 64 patch - a tutorial

These blocks are what I'd like my fellow STS! bee mates to whip up for me this month, as it's my turn to be queen bee. They're a variation on Steffani's St. Louis sixteen patch, basically just shrunken down and quadrupled.
scrap pile 64 patches
This block finishes at 12" (12.5" unfinished) and uses small strips which I managed to find in my scrap pile. Hence the name, since I wasn't sure what else to call it. Does it have a real name? Let me know if you're aware of one. I thought I'd share how to make them.
pick four sets of contrasting prints
You need 16 strips, each measuring 2"x8.5" for this block, in contrasting values for the pattern to really pop. I used four different low volume prints and four different high value prints that "read" a specific color. Essentially we're constructing four 16 patches and then piecing those units into a 4 patch.   
sew four strip sets
Sew your strips into four sets, as shown above. You'll want to use a scant 1/4" seam since there are a lot of seams in this block and a few threads difference really adds up. Make sure and set your seams as well, for the same reason. I also happen to find setting my seams makes pressing them easier and faster
set the seams
For the strip sets, press seams to the dark side. This will make things easier down the road, as your seams will "lock" and allow for perfect points without the use of pins. I didn't use a single pin while piecing these blocks, which makes me quite a happy camper.
press to the dark side
Now take your strip sets to the cutting mat and stack them up on top of each other, using the seams to help nestle them together perfectly. You could always do one at a time, but when doing a whole bunch of these I can go much faster going two or four at a time.
square it up

There's an extra 1/2" of wiggle room built in, so go ahead and square up the one side before you proceed. I like to line up my ruler with the top and bottom edges first, then check to see if the center seam lines up squarely, too. If my piecing and pressing were accurate, and the seams nestled nicely when I stacked the sets, it usually turns out pretty square. If not, I fudge a little and make it work!

subcut, rotate, pair right sides facing
Subcut every 2" and then rotate every other strip and pair them right sides together. I chain piece all the pairs before pairing those pairs...This next part is important! Sew all your pairs together the same way, as in feed them into the machine with the light square on top every. single. time. If you mix up and do it both ways, you'll end up with two sections that won't go together right. 
feed with light fabric starting on top
I did all of mine this way just to be consistent, this will make seams lock the right way later. That little metal thing to the right of my presser foot is a 1/4" guide. It's magnetic and sticks strongly to the needle plate. I bought it a long time ago and only just started using it with all the strip piecing I've been doing lately. I think it helps.
press seams all to one side
Remember to set your seams again, and this time press them all to one side. After that, pair up both sets of 16 patches and rotate until the seams lock when right sides are facing. Sew them together and press that center seam the same direction as the other seams of that unit. Almost done! Sew the one remaining seam and press it whatever direction you want.

Hopefully after all those seams your block comes out at 12.5" or just a smidge under. Mine are a hair smaller, but I figure if all my blocks come back somewhere between 12.25" and 12.5" I should be able to force them all together just fine. Don't worry about slightly wonky edges, I wouldn't bother squaring up your blocks unless they're really heinously uneven. 

Even though these were pretty random pulls from my scrap pile, I think the color palette turned out pretty neat. Like a cheeseburger near the beach or something. Or am I crazy? 

Anyways, hope that didn't bore you! Let me know in the comments if something is totally wrong or ridiculous, I've never posted a real tutorial here before... it's my first time so go easy on me!!

Saturday, May 4, 2013

bee blocks + st louis 16 patch

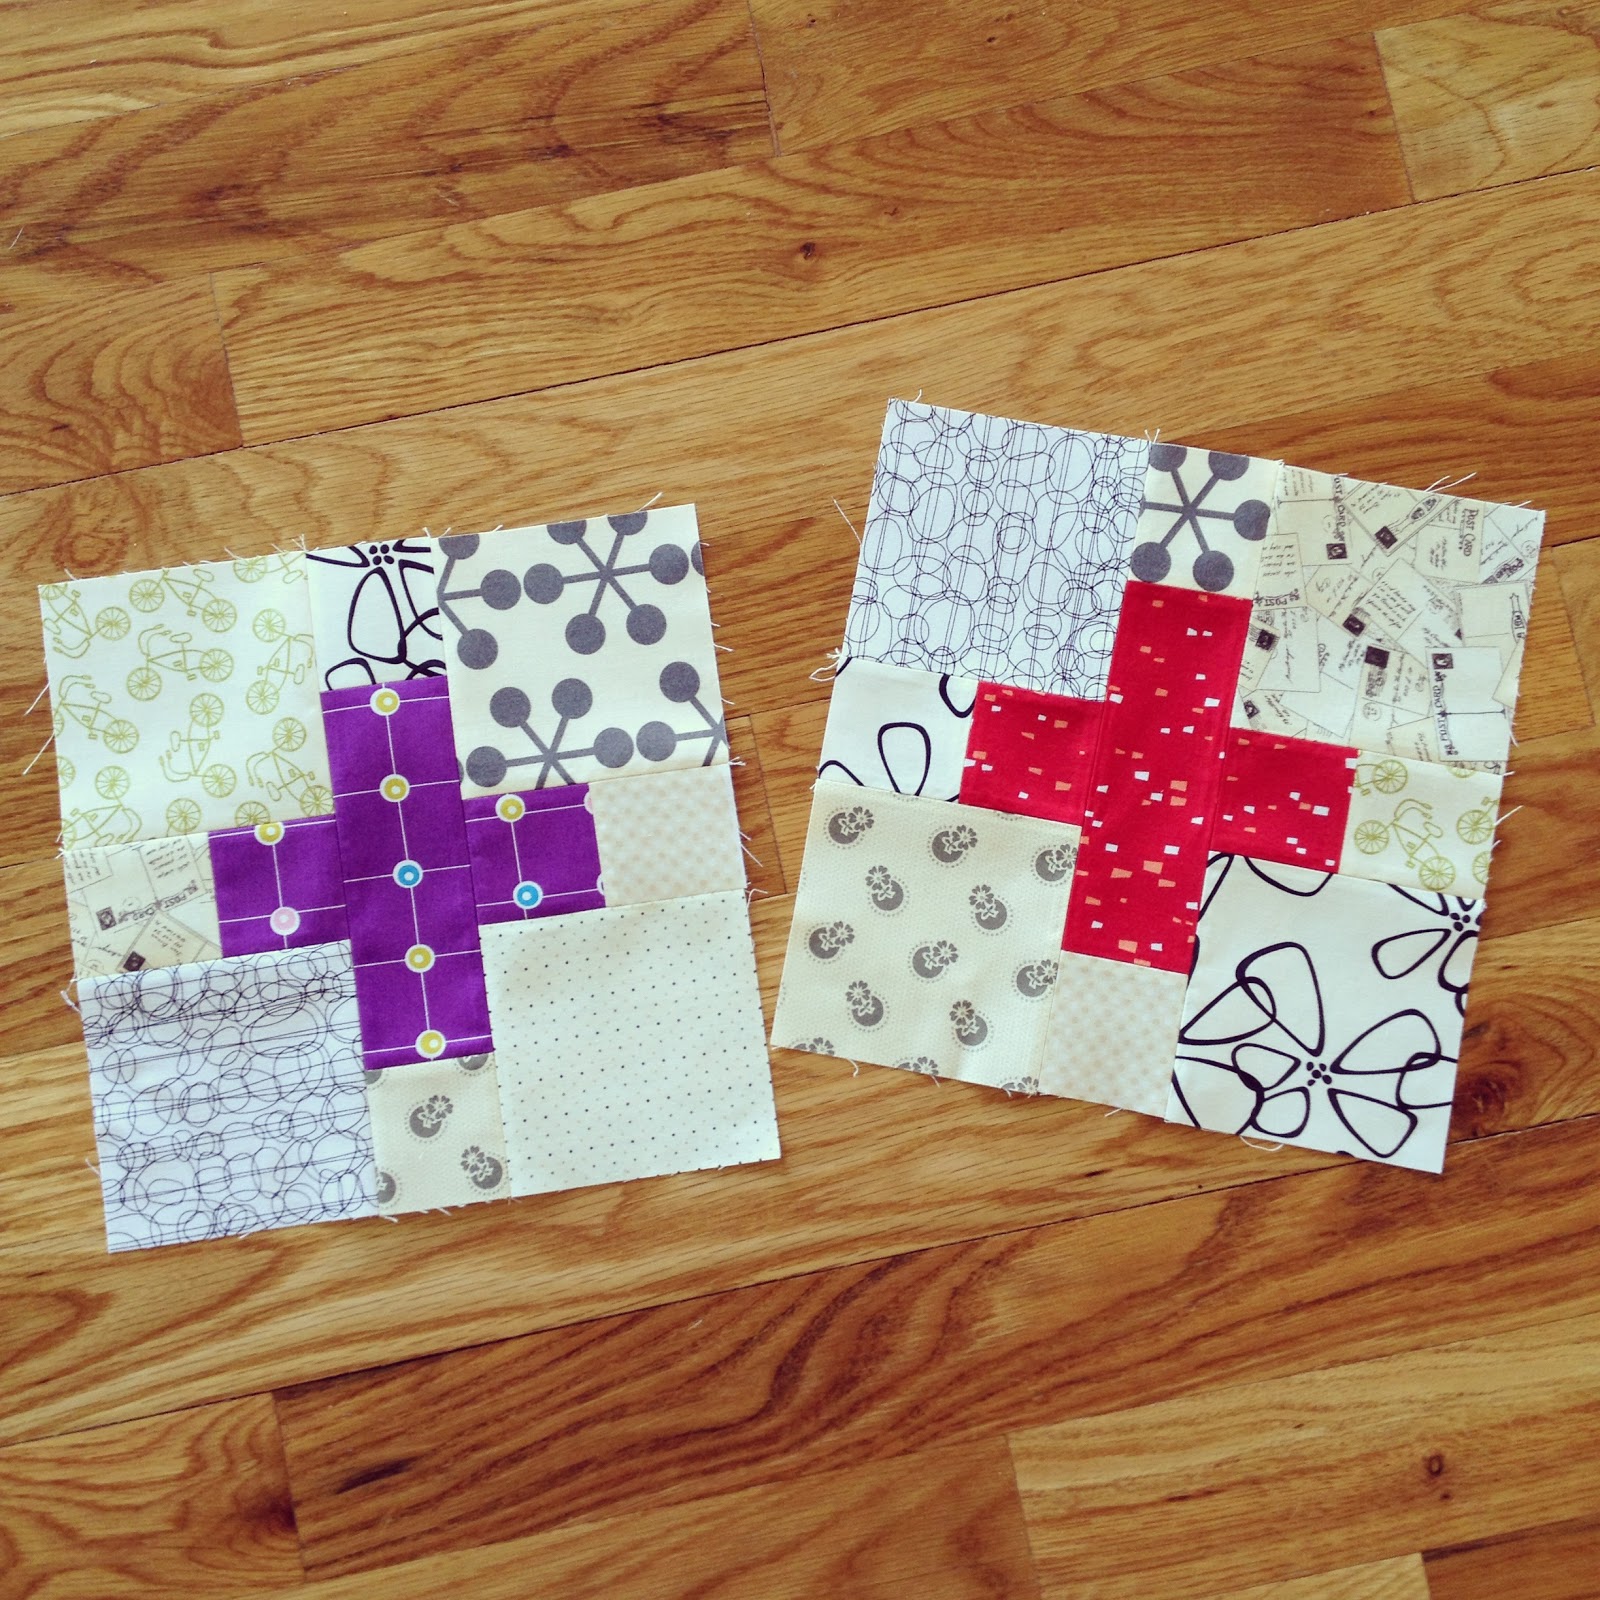
I figure I ought to share my April STS! bee blocks since it's May already. They are for Deb of Life on the Selvage Edge and were a lot of fun to make. She asked for a scrappy, low volume background with a pop of color for the cross. 
low volume charm plus blocks


This month it's my turn to be queen bee. I decided on my block yesterday, sewed up a couple and will be revealing them along with a tutorial of sorts as soon as possible. Probably tomorrow. They're a variation on a project I started recently, which I'll now tell you about!

I've wanted to make a strip-pieced 16 patch quilt for months now, I'd even thought about making one with my Liberty stash for the Give Me Liberty sew-along, but once Steffani's St. Louis sixteen patch hit Instagram, I was all over it. Think scrappy trip along with bigger strips and no seam rippers! 
charleston farmhouse by felicity miller


Two weeks ago I got this Charleston Farmhouse fat quarter bundle in the mail from Pink Castle Fabrics. It was an impulse buy! I'd never seen or heard of this line before, there was a bundle sale going on, I loved the colors and bought it from my iphone without really knowing what it looked like up close! I immediately pulled ten coordinating prints from my stash to give me a total of 30 fat quarters, which will yield 30 blocks for a 5x6 layout. 
with ten stash pulls mixed in


A few nights later I spent roughly 2.5 hours working on it. First I sorted my fabrics into four values: darks, medium darks, medium lights, and lights. I then used a black and white photo to check to see if there were any outliers and adjusted accordingly. A couple of these prints were hard to do considering the print, but I made sure to pair them with something that had color contrast as well just to be safe.
sorted into four values


Then I paired the darks with medium lights and the lights with medium darks in order to get the most contrast in each of my blocks. Again, I double checked with the black and white photo.
contrasting pairs (i swapped middle row, far left with bottom row, second from left after this photo was taken!)
All that might have taken a half hour, maybe less. The real time suck was pressing and cutting! It's one of my favorite parts, though. I did it in a very methodical way, pressing each pairing right sides together so they'd be pressed together and ready to sew after cutting. I use Magic Sizing to stiffen my fabric up, I find it makes the whole process of piecing a quilt a lot easier than using nothing at all.
sub-cutting 4.25" strips


I even upped my strips to 4.25" by 17" in order to get the most out of my fabric and increase the size of the unfinished blocks from 14.5" to 15.5".  The tutorial calls for 4" by 16" strips but you can comfortably squeeze in an extra 1/4" and I even saw someone on IG doing 4.5" by 18" but that leaves you no wiggle room if your fat quarters aren't the right size or perfectly square, or if you just wanna be able to work fast and trim down later. 
a strip-piecing pile-up


At any rate, 2.5 hours of mad crazy strip piecing on the following Friday morning yielded 16 blocks. I finished the remaining 14 a day or two later, which would yield a 75" by 90" quilt. I spent a day or two deliberating how I could manage to make 6 more blocks so it can be big enough for our bed. 
the first 16 blocks, not the final layout


I called numerous local quilt shops (anything within 2 hours driving distance) to see if they had some Charleston Farmhouse so I could get it immediately but had no luck. I tried my stash too, but I'd already pulled as much as I had that would work with this. I ended up ordering more fabric online and if it comes in the next week or so, we might just have a wedding quilt after all! 
Also, don't forget about the Give Me Liberty! sew-along, we'll be linking up our projects over at Bold Goods on Tuesday, May 7th. Can't wait to see you there :D
Related Posts Plugin for WordPress, Blogger...